Evernote Business is a great way to organize teamwork and keep company documents into a single place so it is instantly accessible by anyone in a team. Along with having a copy of the data on client devices (Desktop computers, mobiles) Evernote keeps copy of the data in a cloud.
However, there are a bunch of ways how cloud data could be damaged or lost. Keeping in mind that Evernote Business data loss actually can harm business, the cost of the loss might be too high.
So, how to add an additional level of security for protecting Evernote Business data? Backupery for Evernote comes into play. In a nutshell, the tool allows to automate regular backup of Evernote data to the destination of your choice using common data formats: HTML, PDF, and ENEX (Evernote standard export format).
There are two possible circumstances in which you may want to backup Evernote Business data. The first, and probably is the most important, is when you would have to backup whole Evernote Business data that belongs to a company. It’s applicable for IT Directors, Managed Service Providers or IT staff, in short for those who have access to the whole company’s Evernote Business data.
The second is when you need to backup the data that is related to a particular Evernote Business account. Any member of Evernote Business usually has access to some Business notebooks along with some Personal notebooks. So it might be necessary to protect the data that is related to this particular account only, that is to protect the Business and Personal notebooks that are related to the account.
We’ll cover the both circumstances below.
How to backup whole Evernote Business data that belongs to your Company
So, let’s start from the first scenario, assuming that your intention is to backup whole Evernote Business data. In short, you will need to setup an Evernote account that will have access to all the data that is necessary to protect and then setup Backupery for Evernote application to backup the account. Below is the detailed explanation on how to do that.
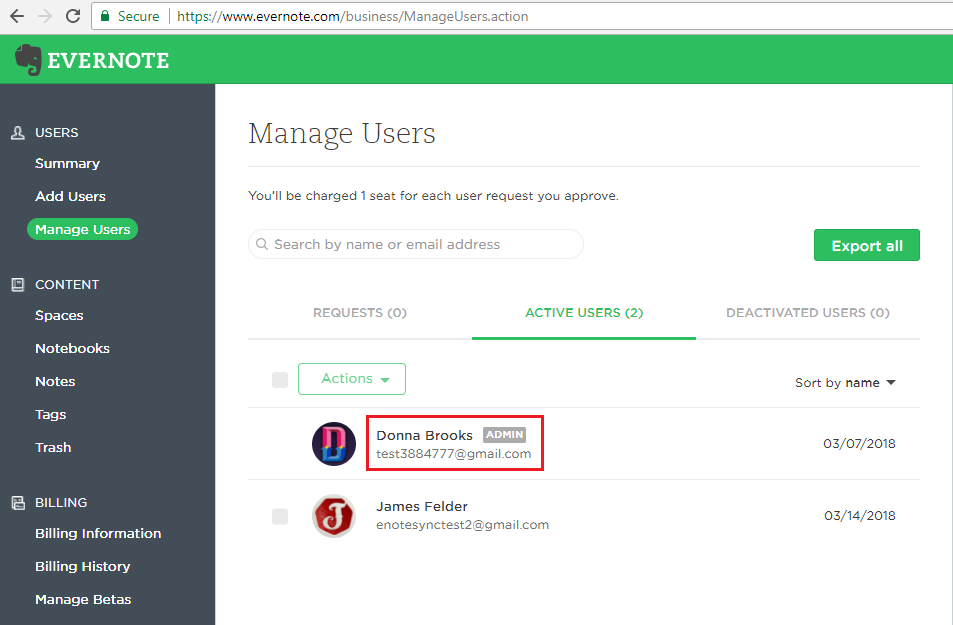
- Login into your Evernote Business Admin Console: https://www.evernote.com/business/AccountSettings.action and choose any Evernote account which will be responsible for backup. You may want to choose your existing Admin account, use existing User account or create completely new account. For the sake of simplicity, let’s call this account BackupAccount. In our example, BackupAccount is the account of Donna Brooks.
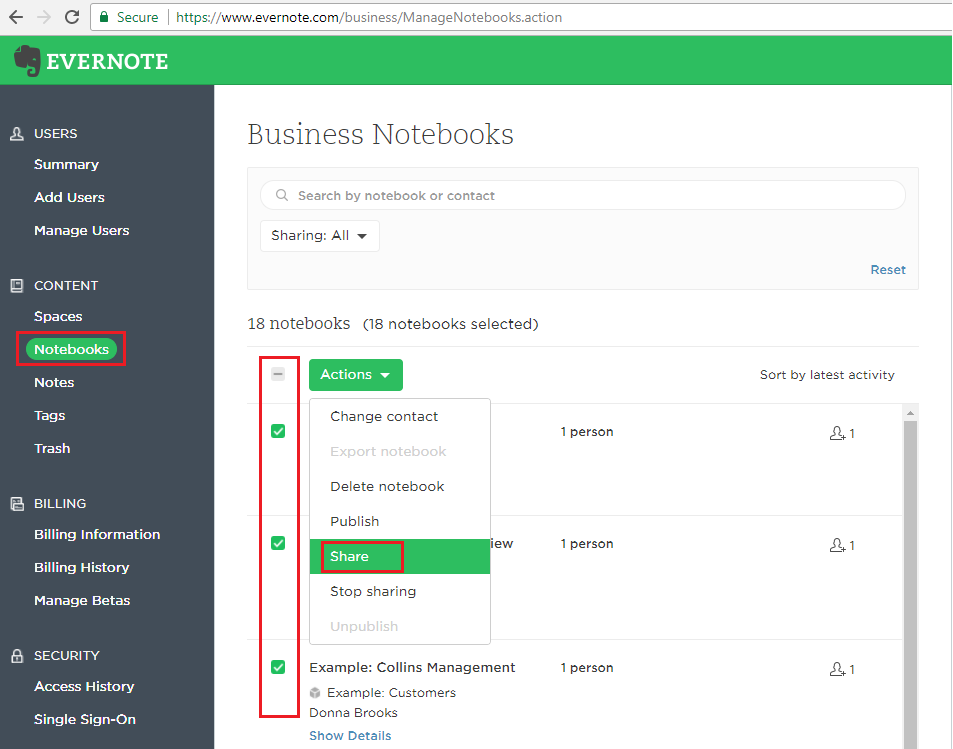
- Evernote Business administrator needs to share all business data with BackupAccount. Even if administrator is BackupAccount, it should share all the data with the account. To do this, go to Notebooks, select all the notebooks and choose Share from the Actions list:
 On Share notebooks popup choose BackupAccount to share notebooks with. In our example BackupAccount is Donna Brooks, so we share notebooks with the Donna Brooks account:
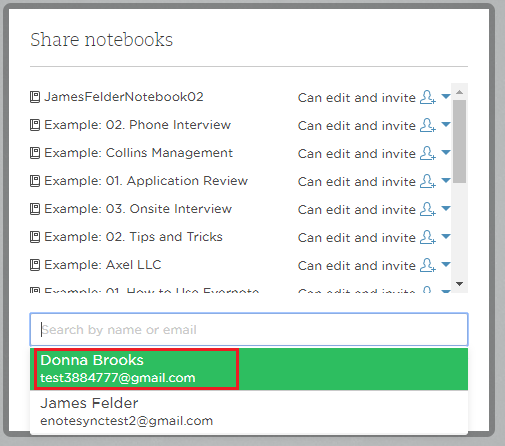
- After successfully sharing Business notebooks, we should install official Evernote client on any computer and login as BackupAccount. Usually BackupAccount’s computer is used, so in our example we use the computer of Donna Brooks.
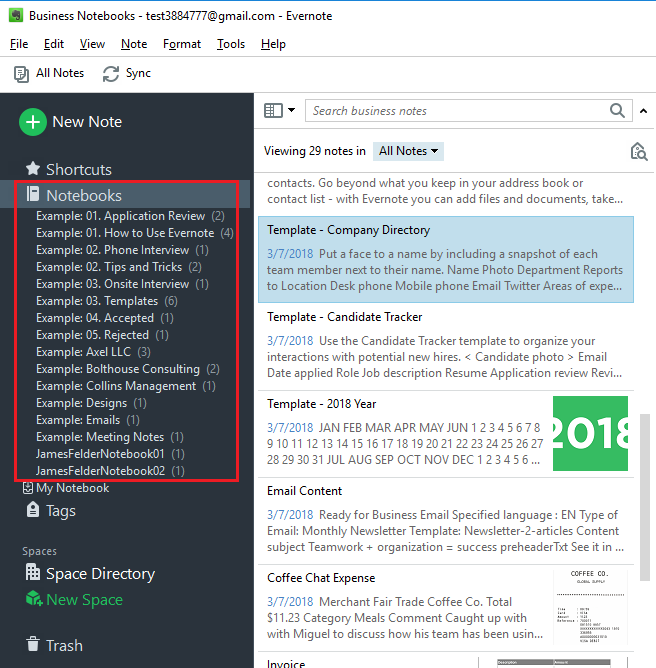 As we see, the business notebooks were successfully shared and synced.
 - Download and install Backupery for Evernote application on the same computer as in the previous step.
- Launch Backupery for Evernote and go to Settings tab:
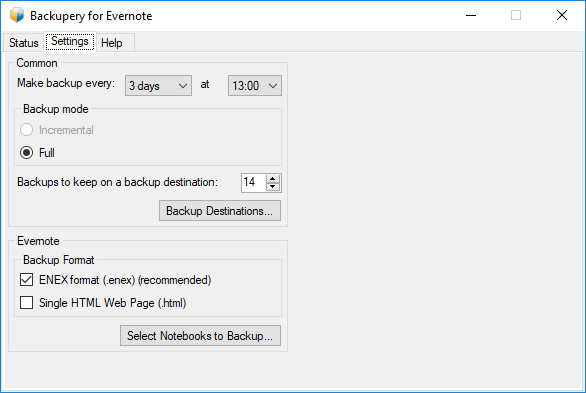 Here you could see different backup settings. For the detailed explanation on what each setting means please refer this article https://www.backupery.com/how-to-backup-evernote-data-automatically. Just for now, press Select Notebooks to Backup… and ensure you see all the notebooks necessary to backup.
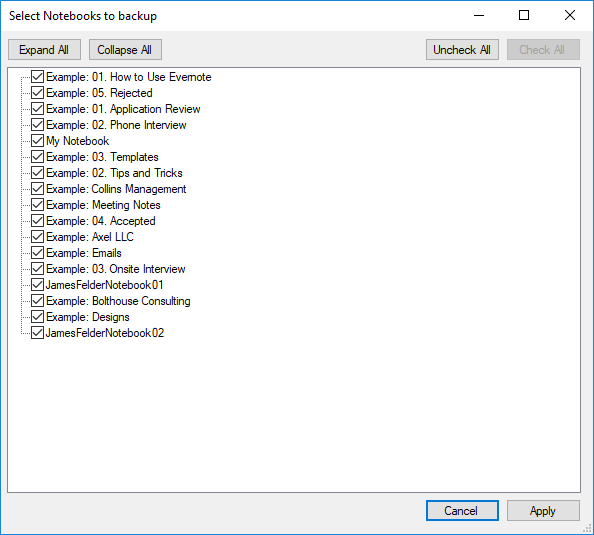 Note, that when a new notebook is added to Evernote, the application automatically schedules the notebook to backup, so you don’t need to select it manually.
 - Return back to Settings tab and press Backup Destinations… There are list of backup destinations for your Evernote data:
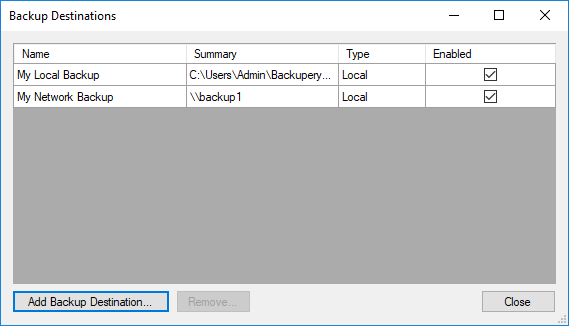 Add or delete any backup destination if necessary.
 - Go to Status tab and press Run Now button. This starts the backup of Evernote data to the destinations you have selected in the previous step. Note, the application will run backup automatically according to the backup period specified on Settings tab.
That’s it. Now you have all Evernote Business data are backed up to the destination of your choice.
How to backup a particular Evernote Business account
The process is identical to the process described above except setting up BackupAccount in Evernote Business Console. So, basically you only need to accomplish steps 5-8.
Now let’s see what we got exported.
To see where the backup destination is just go to Settings tab and press Backup Destinations…: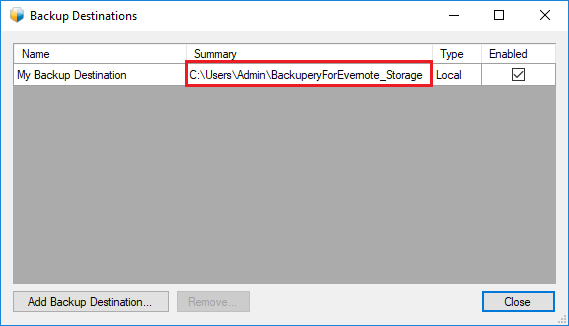
In our example the backup destination is a local directory
C:\Users\Admin\BackuperyForEvernote_Storage
Let’s go to the backup destination and see there are directories are named the same as notebooks that we’ve just exported:
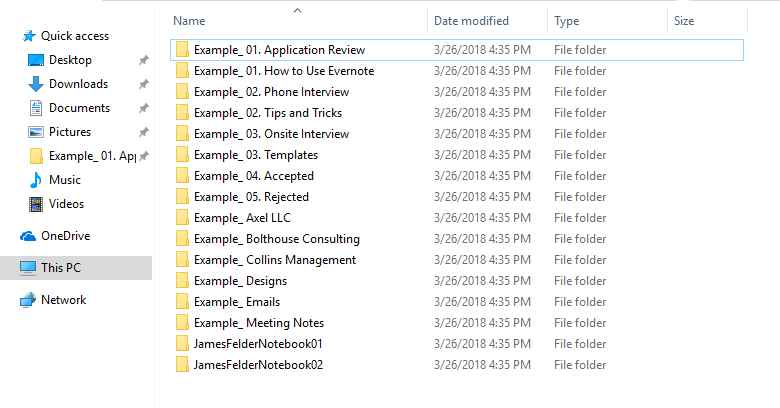
Each directory contains the data exported from the corresponding notebook. Let’s open some directory, for example Example_Axel LLC and see what inside is.
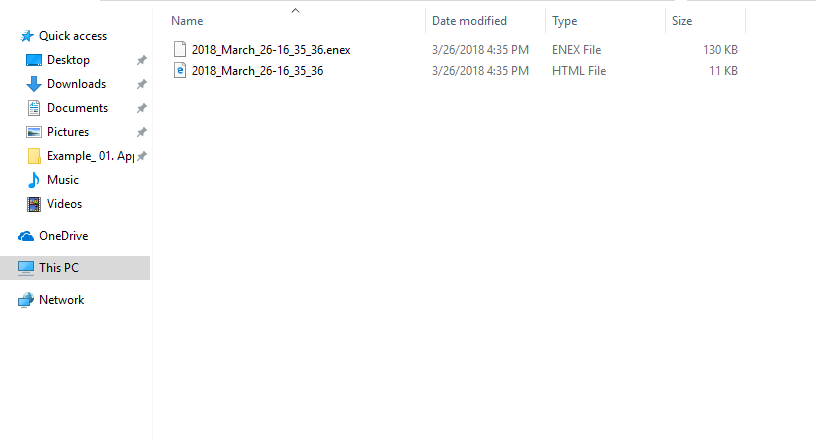
There are ENEX and HTML files are inside. ENEX file is Evernote XML file that is Evernote-standard archive file that is developed by Evernote. You can use this file if you need to import the data back to Evernote.
Also there is a generic HTML file that can be opened in any web browser: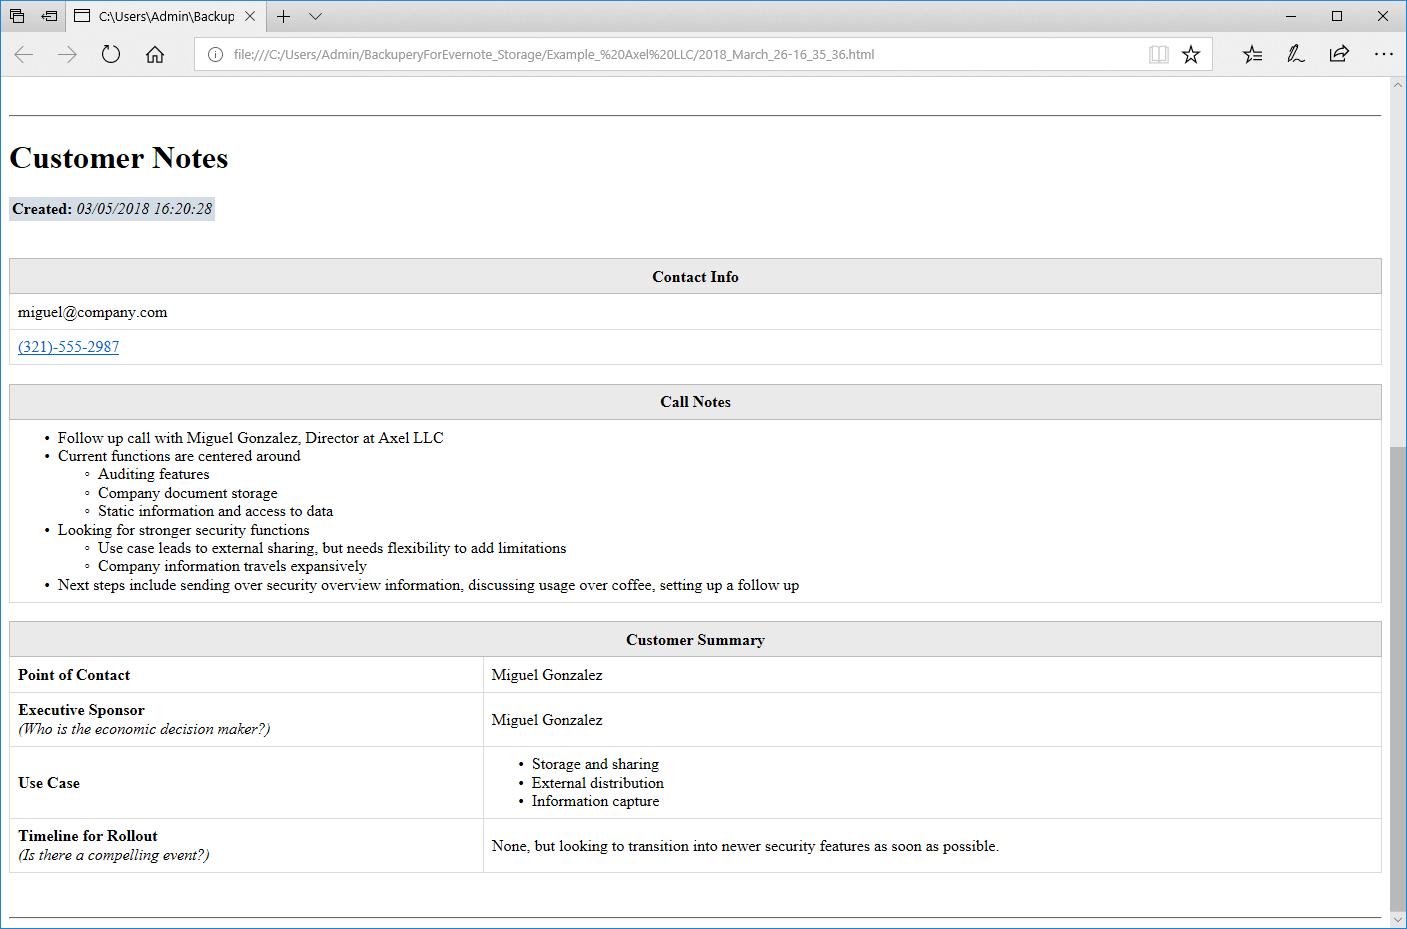
So you can easily get access to the exported notes.
We’ve described a basic backup setup for Evernote Business using Backupery for Evernote tool. If you have any questions please do not hesitate to contact us directly at contact@backupery.com. We are here to help!